This guide is for retro-fitting — replacing the spindles on a staircase you already have, without rebuilding it. Fitting a brand-new staircase instead? The same marking, fitting and fixing methods below still apply — simply skip Step 1 (removing the old spindles), since there's nothing to remove, and start at Step 2. One thing worth checking first: staircases vary in how they're built — some come with pre-formed housings or notches ready to take spindles, while others don't — so it's worth a quick word with your stair manufacturer about the best fitting method for your particular design. Whichever way yours is built, Forxa spindles are made to fit every scenario.
About Forxa metal spindles
Forxa supplies fixed-length metal spindles that are cut to size on site and fitted into base and handrail brackets — the traditional, rock-solid retrofit method, and the system this guide covers.
Handrail and base brackets are sold separately and are not included with our spindles. You can order matching brackets at forxa.co.uk.
What you'll need
- Tape measure and pencil
- Laser level (for marking spindles dead vertical)
- Power drill/driver and bit set
- Screwdriver bits
- Angle grinder with a metal-cutting disc
- Safety glasses and gloves
- Base and handrail brackets — available from forxa.co.uk
How Long Does a Retrofit Take?
For a typical straight flight of 15-20 spindles, a competent DIYer working carefully can expect to complete a full retrofit — removal, marking, drilling, cutting and fitting — in a single weekend. A professional joiner will usually complete the same job in under a day. Compare that to a wood staircase repaint, which takes several days of masking, sanding, priming and multiple coats with drying time between each, and needs repeating every 3-5 years — a metal spindle retrofit is a one-off job, done properly once.
Step 1 — Remove the old spindles
Standard practice for a retrofit. Unscrew or carefully drill out the fixings holding each old spindle in place, top and bottom, then lift it out. If a spindle is glued or doweled in, you may need to cut it free with a multi-tool or small saw rather than forcing it. Once removed, fill and sand any old fixing holes in the baserail and handrail so you have a clean surface to work from.
Step 2 — Measure and plan your spacing
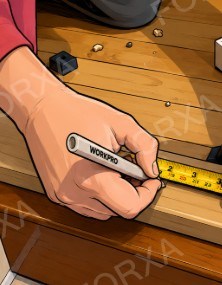
Measure the full length of the baserail and handrail, and divide by the number of spindles to work out even spacing. Mark each fixing point lightly in pencil before you commit to drilling.
⚠️ Building regulations: in the UK, gaps between spindles generally must not exceed 100mm (around 4 inches), so a young child's head can't pass through. Check your local regulations before finalising your spacing.
Step 3 — Mark each fixing position with a laser level
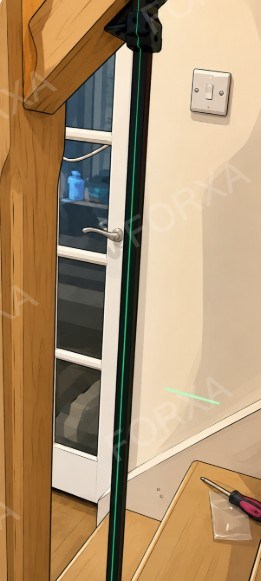
For each pencil mark on the baserail, use a laser level to project a true vertical line up to the handrail and mark where it lands. This keeps every spindle perfectly upright and in line with its neighbours — even if your staircase isn't perfectly square (most aren't).
Step 4 — Drill pilot holes
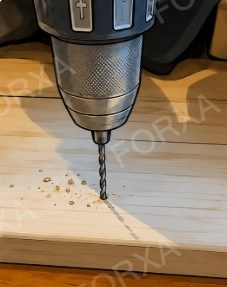
Drill a pilot hole at each marked position on the baserail, and on the handrail if your bracket fixes there too. Match your drill bit size to the screws supplied with your brackets — too large and the fixing won't bite; too small and you risk splitting the wood.
Step 5 — Fit the brackets, cut and fit the spindles
5.1 — Fit and secure the base brackets
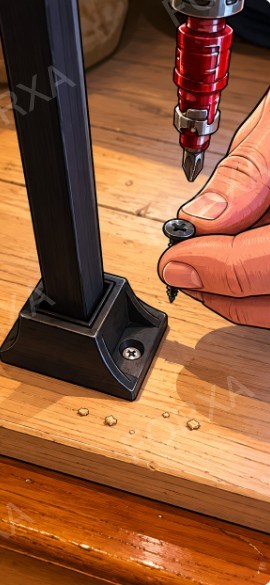
Position each base bracket over its pilot hole and drive in the fixing screws to secure it firmly to the baserail.
5.2 — Cut each spindle to length
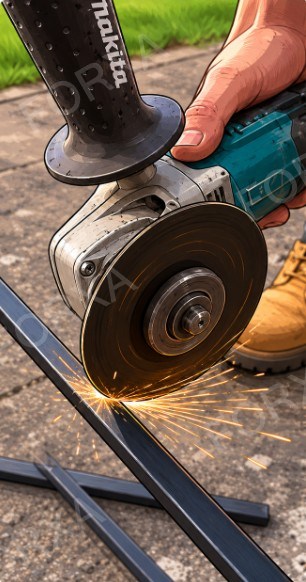
Measure the gap between the base bracket and the underside of the handrail, and cut the spindle to length using an angle grinder fitted with a metal-cutting disc. Wear safety glasses and gloves, and deburr the cut end before fitting.
5.3 — Fit the spindle into the bracket and secure
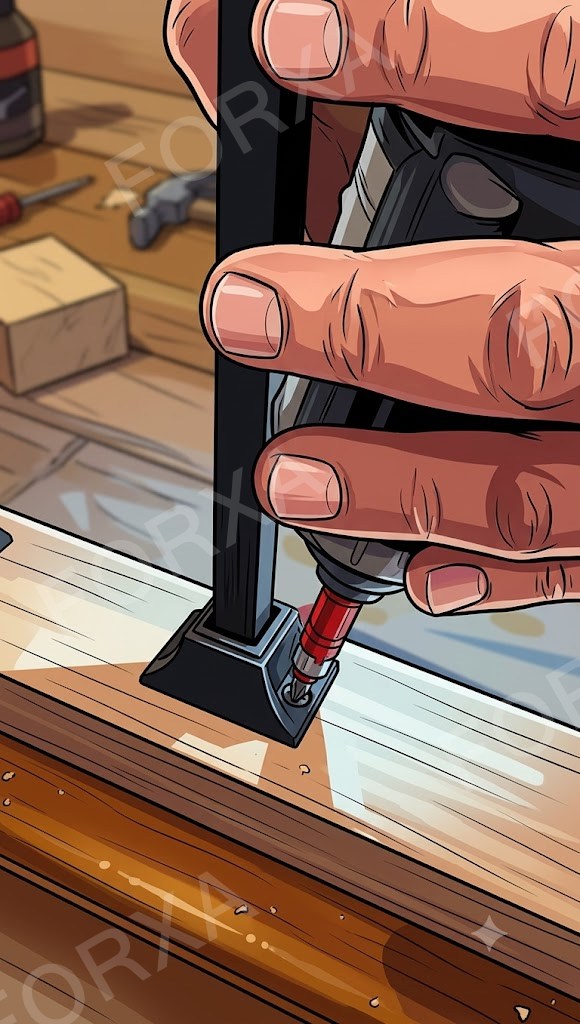
Slot the cut spindle into the base bracket and tighten the grub screw (or fixing screw) to lock it in place. Repeat the same sequence — fit bracket, cut spindle, fit and secure — for each spindle along the run.
Step 6 — Step back and check
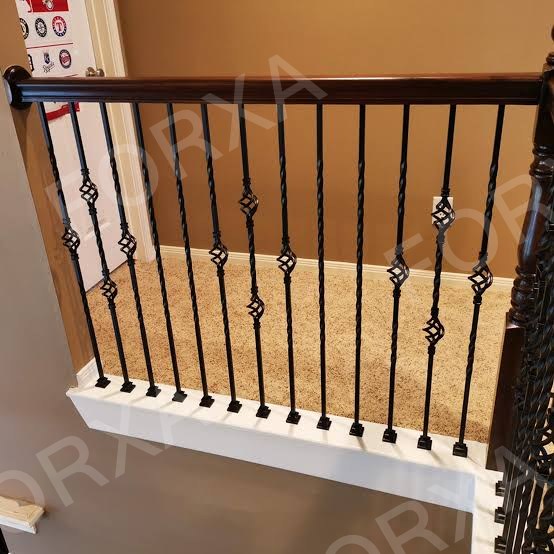
Once every spindle is fitted, walk the full run and check that:
- Every spindle is vertical and evenly spaced
- All fixings are tight, top and bottom
- Nothing rocks, rotates or rattles when you push it
Touch up any marks on the baserail or handrail left over from the old spindles, and you're done.
Common Mistakes to Avoid
- Skipping the laser level — marking positions by eye alone almost always results in spindles that lean slightly, which becomes very obvious once the whole run is in. Most staircases aren't perfectly square, so a true vertical line matters more than it looks like it should.
- Cutting spindles too short — always measure the actual gap on site for each spindle rather than assuming they're all identical; treads and handrail height can vary slightly along a single run, especially on older staircases.
- Over-tightening grub screws — enough to lock the spindle firmly, not so much that the thread strips or the spindle end deforms. Snug and secure is the goal, not maximum force.
- Forgetting to deburr cut ends — a freshly cut metal edge is sharp and can also prevent the spindle from seating cleanly into its bracket. A quick pass with a file solves both problems.
- Not checking spacing against current regulations first — see our UK Building Regulations guide before finalising your spindle count and spacing, particularly if your existing staircase pre-dates current standards.
Troubleshooting
A spindle wobbles slightly once fitted
Usually means the grub screw hasn't been fully tightened, or the pilot hole was drilled slightly oversized for the bracket's fixing screw. Check the fixing first before assuming the spindle itself is at fault.
The bracket won't sit flush against the baserail
Check for old paint, filler, or debris left over from removing the previous spindle — brackets need a clean, flat surface to seat correctly. A light sand at the fixing point usually resolves this.
The gap at the top or bottom looks uneven
This is almost always a measuring issue rather than a fitting one — double check the actual on-site gap for that specific spindle rather than reusing a measurement taken elsewhere on the run.
Frequently Asked Questions
Can I retrofit metal spindles onto a wood staircase?
Yes — this is the most common scenario. Forxa spindles are designed to retrofit onto existing wood baserails and handrails using the bracket system covered in this guide, without needing to rebuild the staircase itself.
Do I need to replace the handrail or baserail too?
Not usually. As long as the existing baserail and handrail are in sound structural condition, new spindles fit directly onto them using brackets — you're replacing the spindles, not the staircase.
Can I do this myself, or do I need a joiner?
Many customers fit their own spindles successfully using this guide, particularly with basic DIY experience and the right tools listed above. If you're not confident cutting metal accurately or working with a laser level, a joiner will typically complete the job in well under a day.
Ready to start your retrofit?
Browse the full Forxa spindle range and request your free catalogue — over 200 products in 10 premium finishes.